New Work is the main way work enters Coroid. You describe the work once, then route it as a task, a phased plan, a report or a recurring schedule.
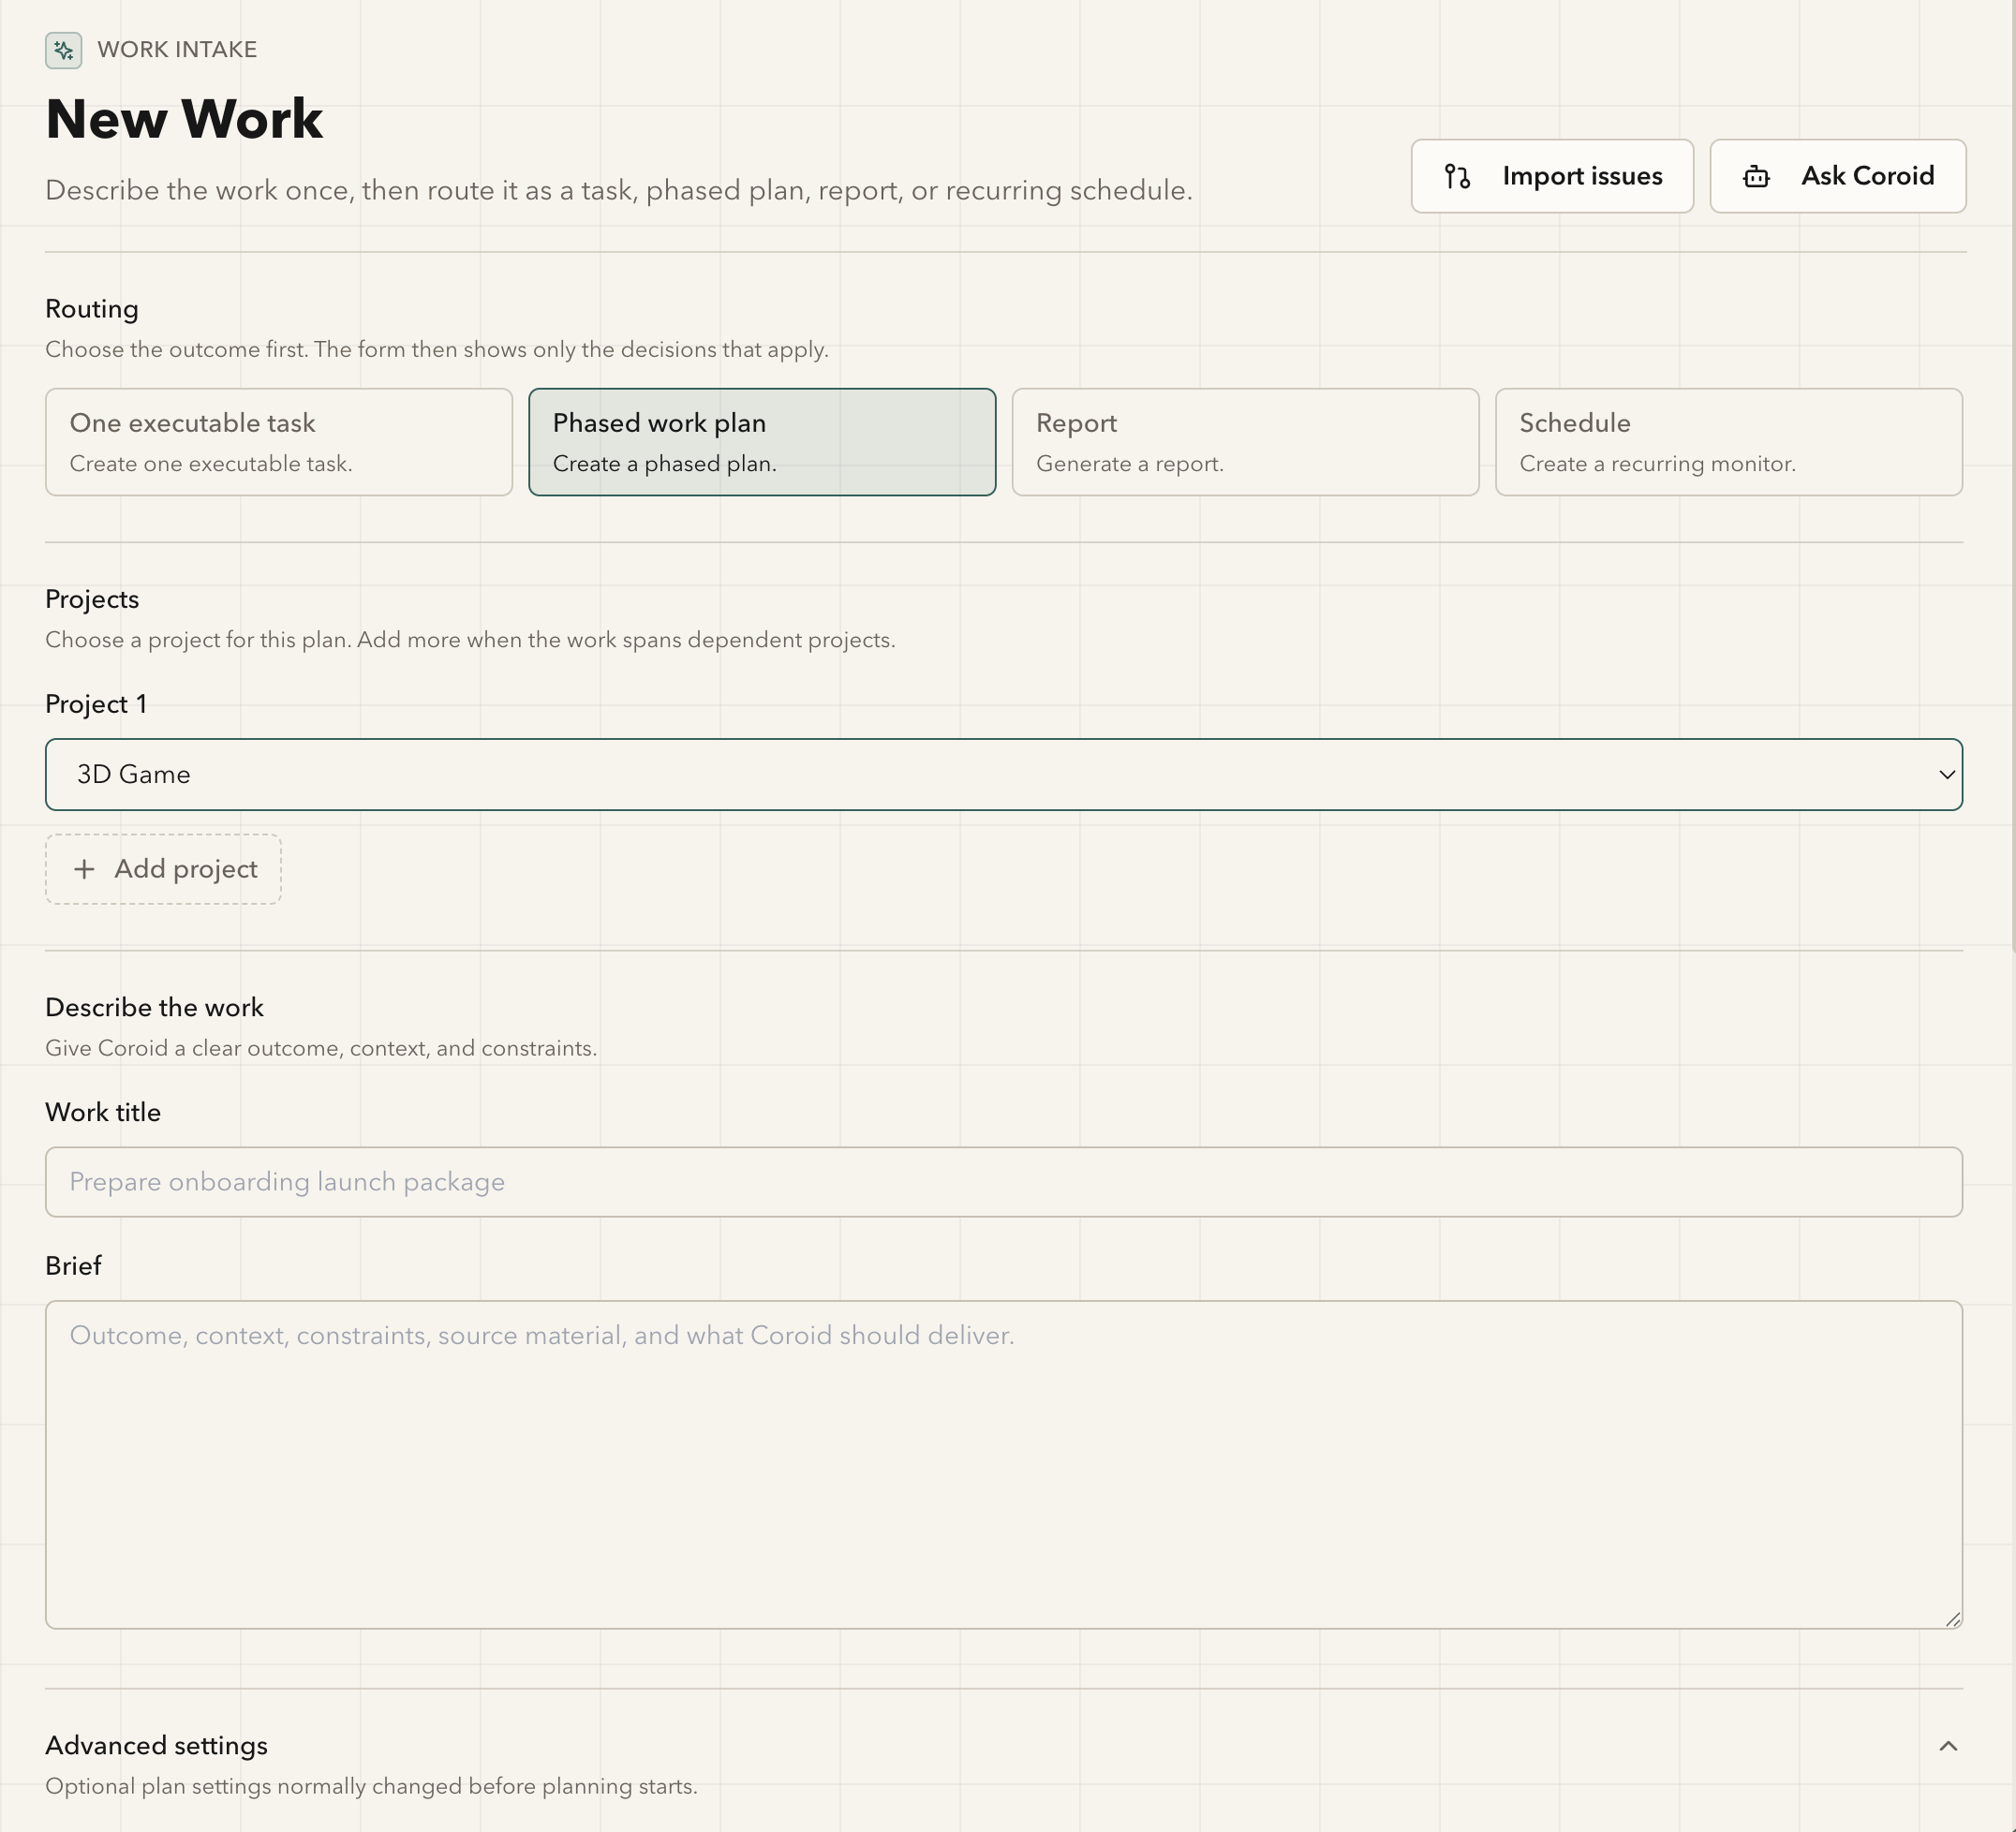
Routing — choose the outcome first
Routing is your choice, not a guess Coroid makes. Pick it first; the form then shows only the decisions that apply to that outcome.
| Option | Produces |
|---|---|
| One executable task | A single task, ending in one pull request |
| Phased work plan | A phased plan you approve before code is written |
| Report | A generated report |
| Schedule | A recurring monitor |
Choose one executable task when the work is a single change a reviewer could read in one sitting. Choose phased work plan when it needs several changes in a particular order, or when you want to see the whole approach before committing to any of it.
Two shortcuts sit alongside the form: Import issues brings work in from a tracker, and Ask Coroid hands the same job to the chat assistant.
Projects
Choose the project this work belongs to. You can add more projects when the work spans dependent projects — that is how cross-project work is expressed.
Describe the work
Two fields, and they do different jobs.
Work title — a short name. This is what you will scan for in lists later.
Brief — the substance: outcome, context, constraints, source material, and what Coroid should deliver. Write the outcome rather than the implementation; the plan is Coroid's job and you approve it.
Add rate limiting to the public API.

100 requests per minute per API key. Exceeding it returns 429 with a
Retry-After header. Limits are per key, not per IP.

Internal service-to-service calls are exempt — they authenticate with
service tokens, not API keys.

Do not change the existing auth middleware's public interface.
That last line is doing real work. Scope lines are the difference between a focused change and a sprawling one.
Advanced settings
Optional, and normally set before planning starts.
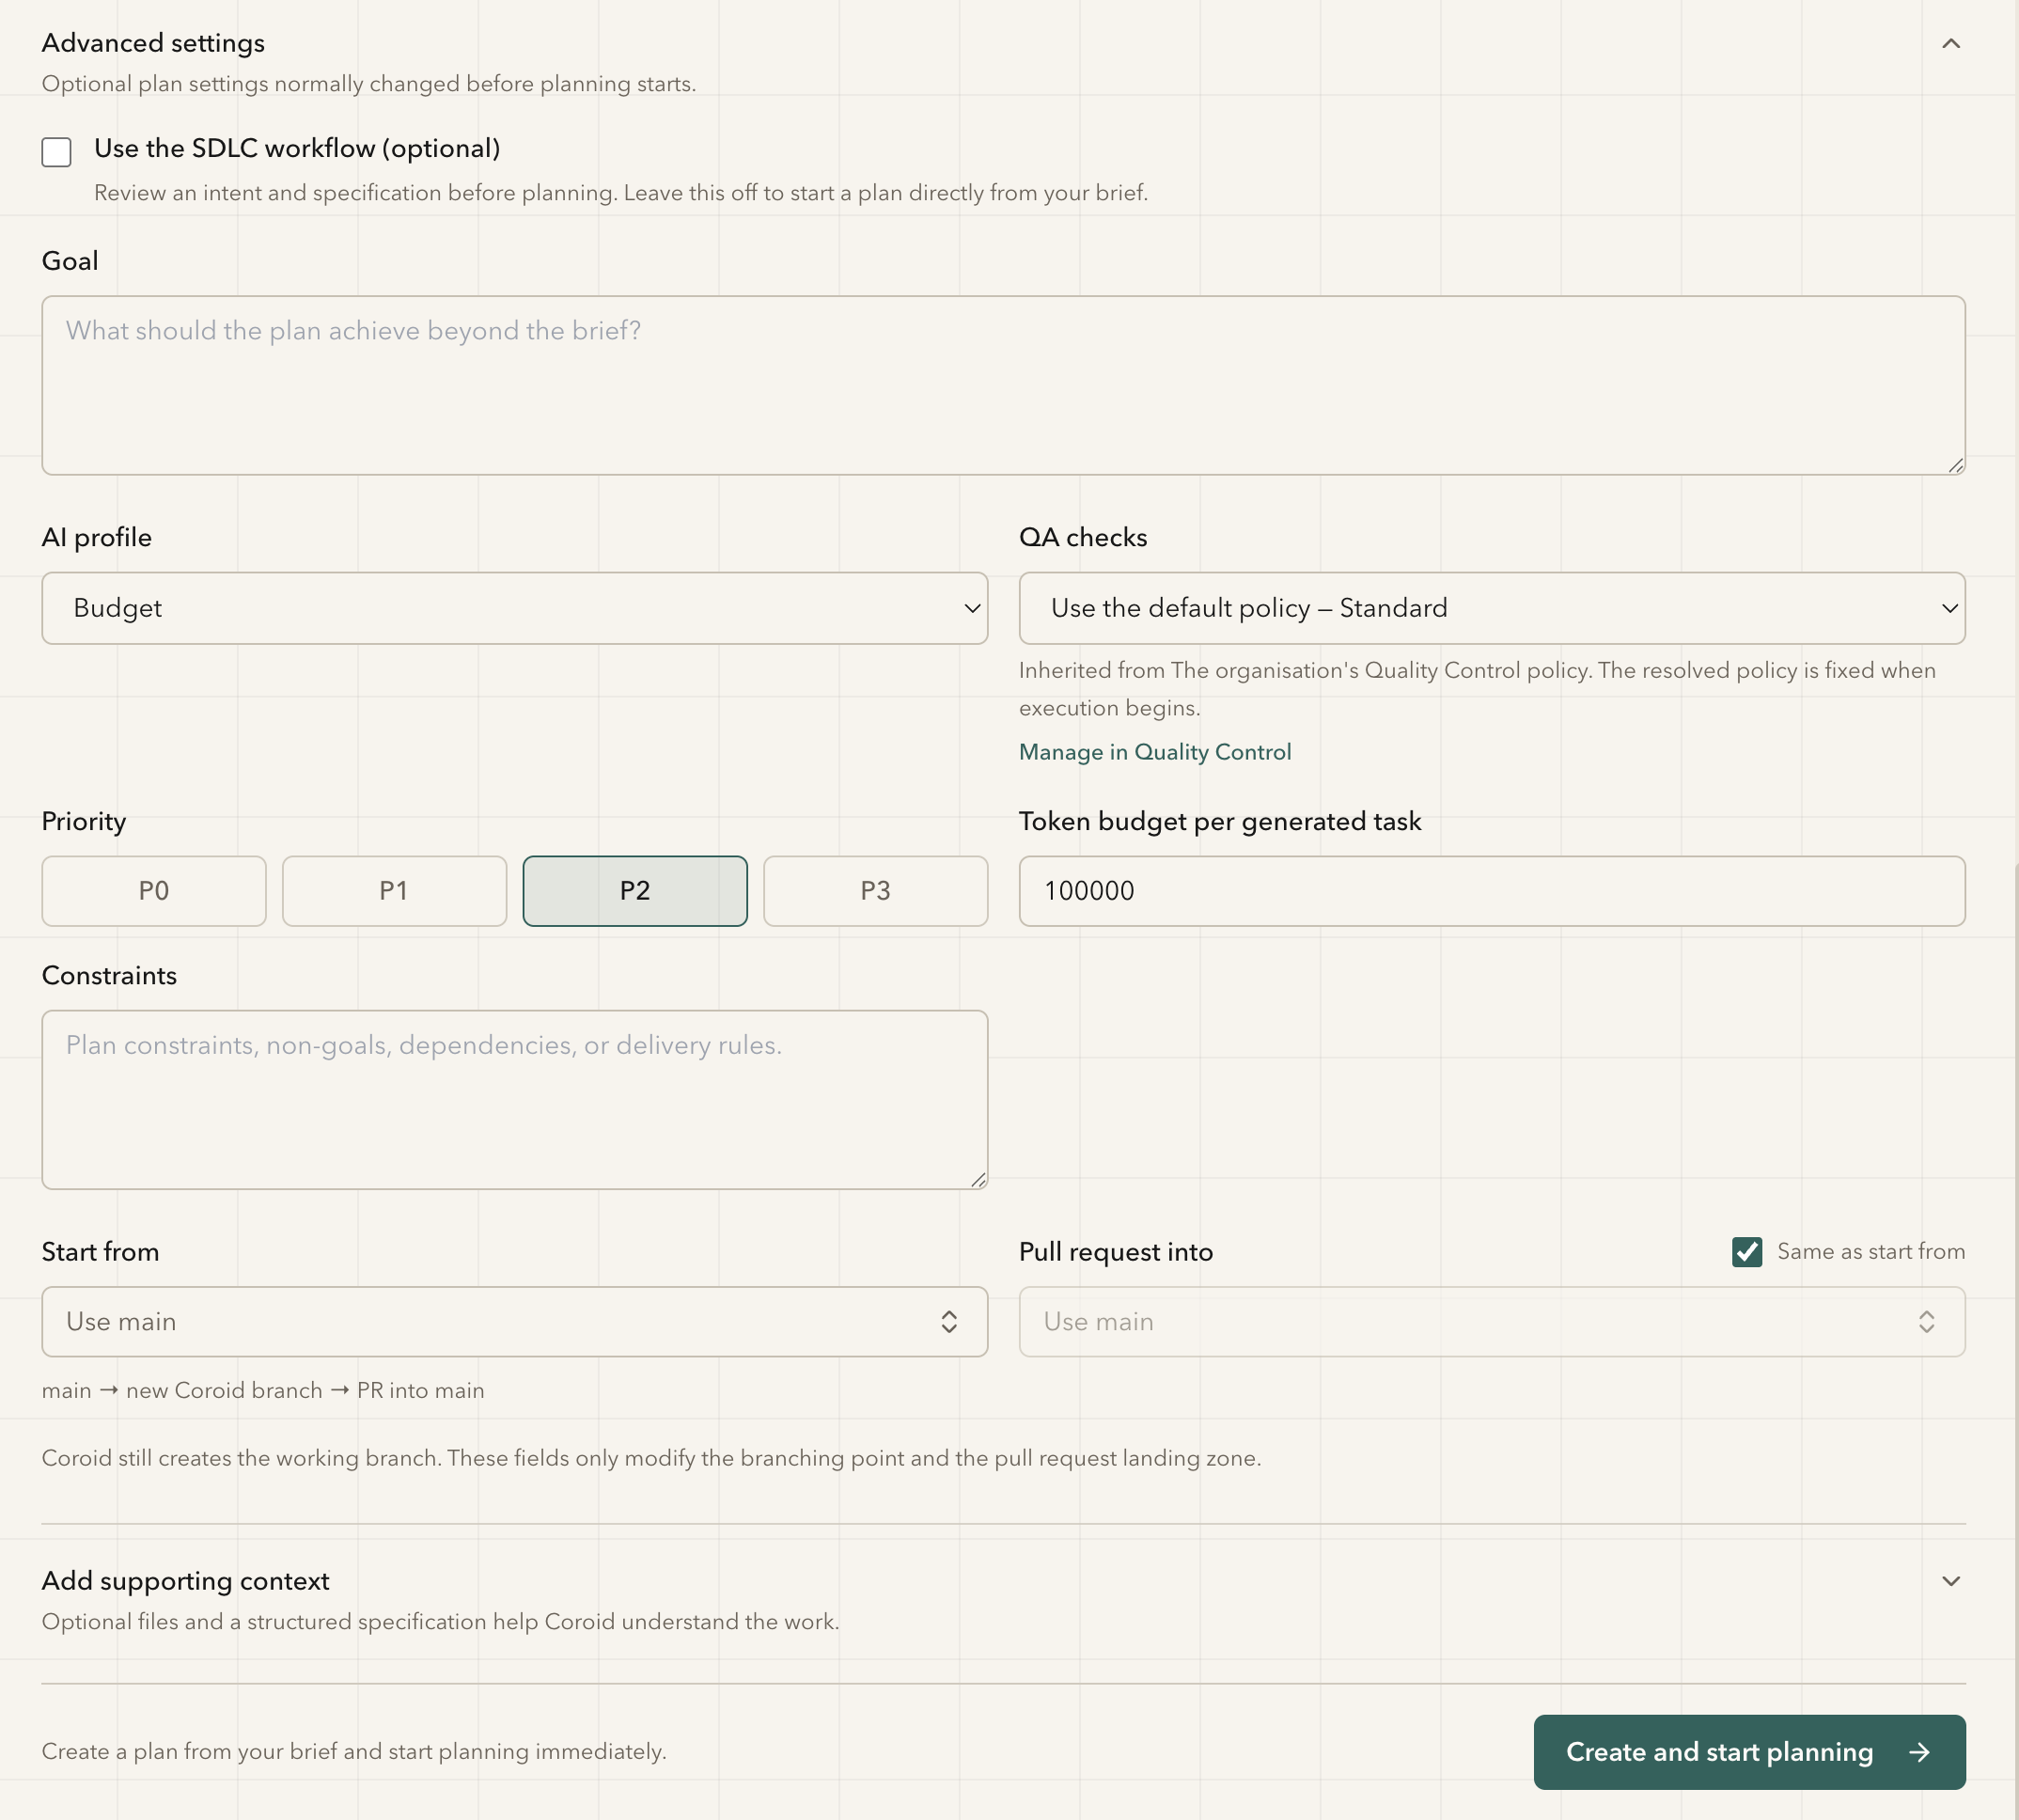
Use the SDLC workflow
Off by default. Turn it on to review an intent and a specification before planning begins. Left off, planning starts directly from your brief.
Turn it on when the work is consequential enough that you want a checkpoint before an approach is even drafted. Leave it off for work where the brief is already unambiguous.
Goal
What the plan should achieve beyond the brief. Use it for the outcome behind the request — the brief says what to build, the goal says what it is for.
AI profile
Which models run this work. See AI profiles.
QA checks
Which quality policy applies. Defaults to the organization's Quality Control policy, and the resolved policy is fixed when execution begins — changing the org policy afterwards does not retroactively change work already running.
See Quality policies and gates.
Priority
P0 to P3, defaulting to P2. Priority orders the queue when more work is
waiting than there are agent slots. It does not add capacity — see
Capacity and agent slots.
Token budget per generated task
The ceiling on how much context each generated task may consume. Raise it for work that needs to read widely across a large codebase; lower it to keep spend tight on routine work.
Constraints
Plan constraints, non-goals, dependencies and delivery rules. This is where explicit non-goals belong — the single most effective field for preventing scope creep.
Start from / Pull request into
Which branch the work starts from, and which branch the pull request targets. Same as start from is ticked by default, so both follow one setting.
main → new Coroid branch → PR into mainCoroid always creates the working branch. These fields only change the branching point and where the pull request lands — they cannot make Coroid commit directly to an existing branch.
Use them when you merge into something other than your default branch, such as a
develop branch or a release train.
Add supporting context
Optional files and a structured specification. Attach material specific to this work — a ticket, a design document, a stack trace.
For material that is durably true about the project, use project context instead, so it applies to everything rather than being re-attached every time.
Starting it
Create and start planning creates the plan from your brief and begins planning immediately.